Introduction
This guide provides a step-by-step approach on how to safely and effectively replace the RAM card in a Toshiba Satellite laptop, Model Number - C70D-A.
Before starting, it is crucial to ensure that the new RAM is compatible with the Toshiba Satellite C70D-A. Checking the laptop’s specifications and purchasing the correct type of RAM will prevent compatibility issues. Most Toshiba Satellite C70D-A laptops use DDR3 RAM, but verifying this with the laptop's documentation or the manufacturer’s website is recommended. Replacing the RAM in a Toshiba Satellite laptop requires minimal tools, typically a small Phillips-head screwdriver to open the laptop’s back panel. An anti-static wrist strap is also highly recommended to prevent static electricity from damaging the laptop’s internal components. If an anti-static wrist strap is unavailable, regularly touching a grounded metal object to discharge any static build-up is advised.
Upgrading the RAM can significantly improve a laptop's performance, making the system run more smoothly, handle more applications simultaneously, and improve overall speed. This repair might be needed if the laptop is running slowly, frequently freezes, or struggles with multitasking. Increasing the RAM can rejuvenate an older laptop, extending its usability and improving user experience. By following this guide, users will be able to confidently and effectively replace the RAM in their Toshiba Satellite C70D-A laptop, enhancing its performance and extending its lifespan.
Warning: While this is a relatively simple procedure, there are a few hazards to be aware of. Static electricity can damage sensitive computer components, so working in a static-free environment is crucial. Additionally, handling the RAM modules carefully is essential, as they can be easily damaged by bending or excessive force. Ensure the laptop is powered off and unplugged from any power source before starting the process.
-
-
Power off and unplug the charger from your device.
-
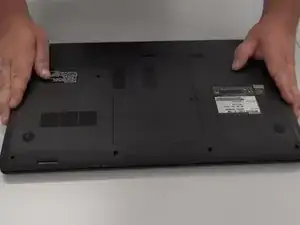
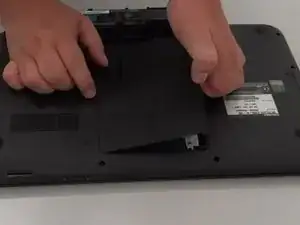
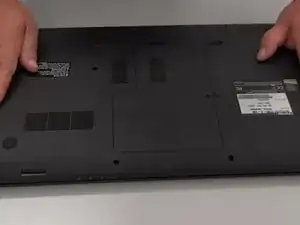
Carefully flip your device upside down, laying it on a flat surface with the battery facing you.
-
-
-
Slide the two eject switches located on the right and left sides of the battery compartment to release the battery.
-
Gently remove the battery.
-
-
-
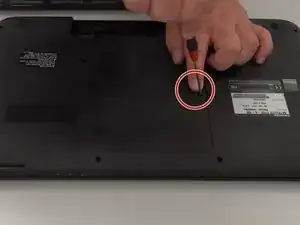
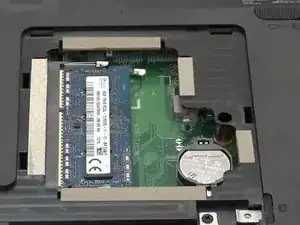
Use a Phillips #1 screwdriver to loosen the single 7.0 mm screw from the hard drive/RAM panel.
-
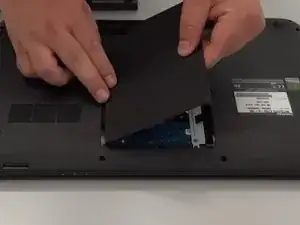
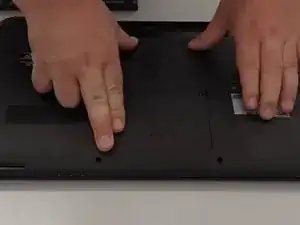
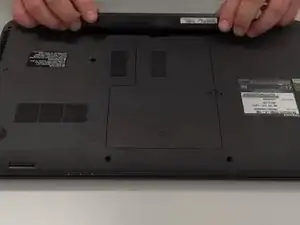
Pull the cover towards you and up from the device to remove it.
-
If the cover does not come off easily, use an opening tool or spudger to gently pry the cover up.
-
-
-
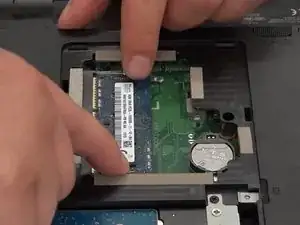
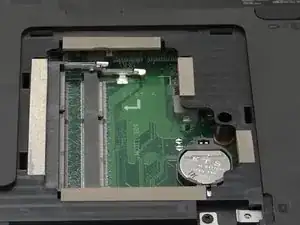
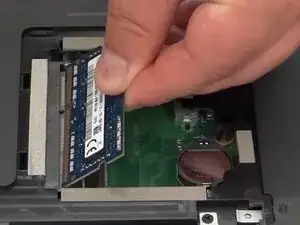
Push outward on the metal arms to release the RAM from its slot.
-
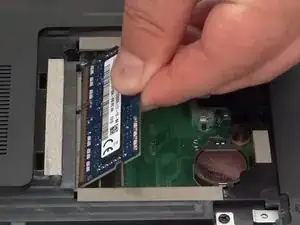
Carefully slide the RAM stick out of the slot.
-
-
-
After removing the old RAM stick insert the new RAM card.
-
Gently push down on the RAM stick so the metal arms lock around it.
-


To reassemble your device, follow these instructions in reverse order.