Introduction
Are you experiencing issues with your Toptro TR23 remote not working with your projector? You can try replacing the IR sensor. All you need is the iFixit Opening Tool, a 2.5 flathead screwdriver and a 000 Philips screwdriver and 5 minutes.
Most household electronics use infrared (IR) remote controls to operate the device from a distance. The TopTro TR23 is no different. These remote sends a signal with IR rays to an IR sensor that are mounted near the front and center of most devices.
Before using this guide, I would make sure that there are no hard, opaque surfaces blocking the path between the remote and the sensor. If there is something blocking the waves from reaching the sensor from the remote, the no matter how much you ush the button or how many sensors you replace, your problem will still persist.
Also, I would check to make sure there are fresh batteries in the remote. A faulty source of power in the controller could be a cause for it not working as well.
Before beginning, make sure the projector's power cable is unplugged and is on a sturdy work surface.
-
-
Set the projector on its side so the the front is facing to your left.
-
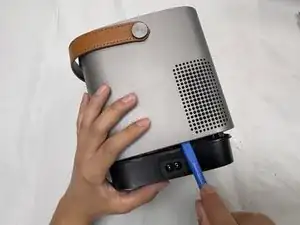
Insert an opening tool into the seam between the black chassis and the silver case.
-
Pry around the perimeter until the case fully releases.
-
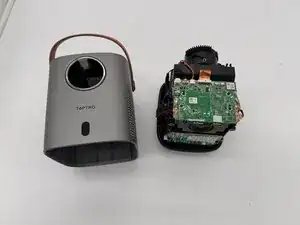
Remove the case.
-
-
-
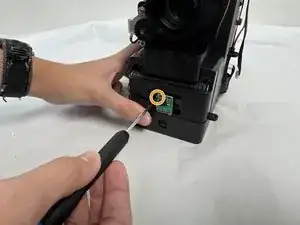
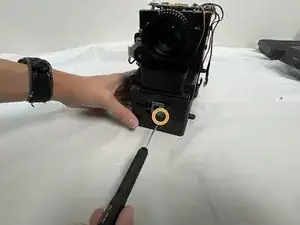
With the projector lens facing you, locate the IR sensor mounted on front and the two mounting screws that attach the IR sensor and board to the projector.
-
Use a Philips #000 screwdriver to remove the two 6.3 mm screws holding the sensor onto the front of the projector.
-
-
-
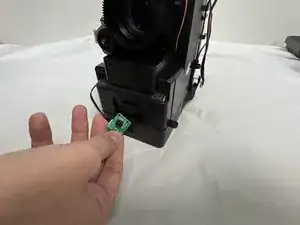
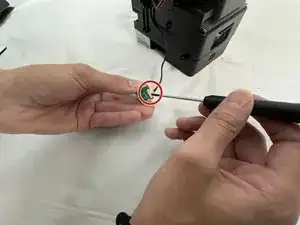
Remove the IR sensor from the plastic mounts with care not to strain the attached wire.
-
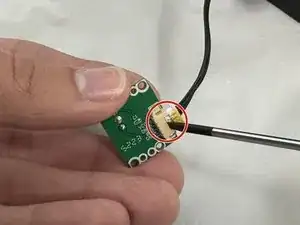
Turn the sensor over to reveal the wire harness and clip.
-
Use a small flathead screw driver to gently pry out the connector from its socket.
-


To reassemble your device, follow the above steps in reverse order.
Take your e-waste to an R2 or e-Stewards certified recycler.
Repair didn’t go as planned? Try some basic troubleshooting or ask our Answers community for help.