Introduction
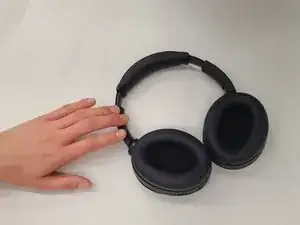
Follow this guide to replace the motherboard on the Sony WH-1000XM4 wireless headphones.
Ensure the headphones are powered off and discharged.
As a precaution utilize the antistatic wrist strap to avoid damaging any of the electronic components.
You will need solder to reassemble.
-
-
Use your thumb to depress the LEFT ear pad near the long outer edge, creating a gap between the cushion and the frame. (The right ear cup is pictured, but the process is identical for the left ear cup.)
-
Pivot the spudger down to unclip the long edge of the ear pad.
-
Repeat around the perimeter of the ear pad until it is loose.
-
-
-
Remove the left ear pad. (The right ear cup is pictured, but the process is identical for the left ear cup.)
-
-
-
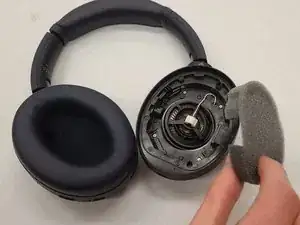
Remove the foam liner from the left ear cup's speaker. (The right ear cup is pictured, but the process is identical for the left ear cup.)
-
-
-
Use a Phillips #00 screwdriver to remove the four 8.4 mm screws securing the left ear cup cover. (The right ear cup is pictured, but the process is identical for the left ear cup.)
-
-
-
Flip the headphones over, ear cups facing down.
-
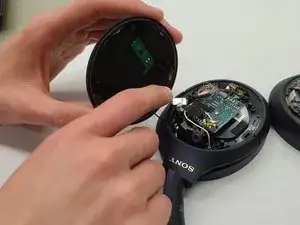
Use your fingers to lift up and flip over the left ear cup cover.
-
-
-
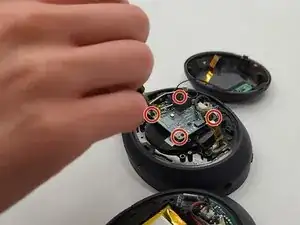
Unscrew the 4 screws in the corners of the motherboard to loosen it from the left ear cup assembly.
-
-
-
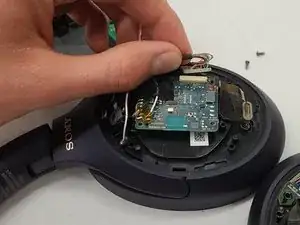
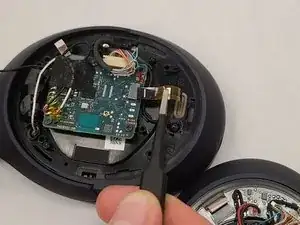
Carefully remove the multipin connector (multiple colorful wires) from the side of the motherboard.
-
-
-
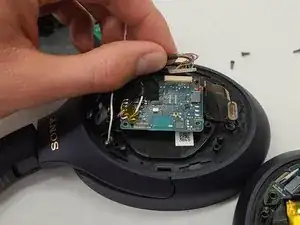
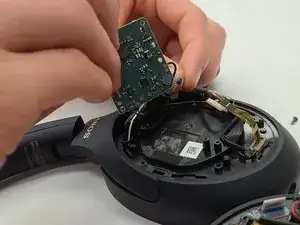
Carefully lift the motherboard out from the ear cup to access the other cable ribbons and connectors.
-
-
-
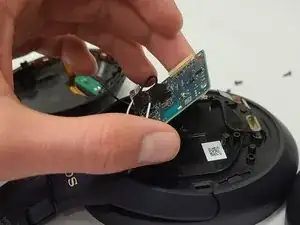
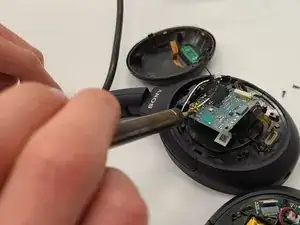
Remove wires from the side or bottom of the motherboard that are attached by pin connectors.
-


To reassemble your device, follow these instructions in reverse order.