Introduction
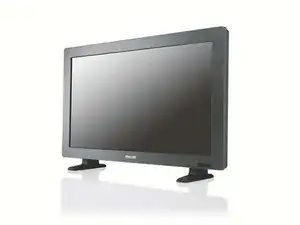
I picked up a batch of free TV's off of Letgo and one of them was this Philips BDL4231 LCD TV that would not power on and the power supply was making a whining clicking noise that was a little different from the typical switch mode power supply "ticks" I've heard before.
I inspected the power supply board and saw that the largest four capacitors were all bulging on the top and leaking. There were also burn marks on both sides of the PCB where the largest diodes are location.
I found a shopjimmy.com repair kit for the board since I couldn't find a replacement board for less on eBay or elsewhere online.
I ordered the kit and found that there wasn't the C955 2200uF 16V capacitor and the D924 diode included with the kit... though the support staff at shopjimmy.com referenced where I could purchase the C955 capacitor and verified I can use my capacitors that almost total that amount in parallel as I was thinking.
I replaced just the three capacitors C952, C953 & C954 and two diodes ZD902 and ZD904 and now the TV is working, albeit with a high pitch "hissing like noise" so I figured the other C955 capacitor since bulging needs to be replaced still along with the ZD906 diode next to the D924 diode.
ZD906 diode as well as another diode and some other capacitors came with the kit. I'll update this once I determine if I need to replace the D924 diode since that area does look a little burnt.
Tools
Parts
-
-
Remove the 16 back cover screws.
-
Remove the six power supply board screws.
-
Remove the one power supply board 120V connector screw.
-
If needed remove the VESA mount 5 screws and loosen the other side 5 screws to position the brackets so the power supply board can be removed.
-
-
-
Remove the connectors to the power supply board, i.e. 120V connector and the three other connectors being careful to note placement of the two connectors on the left side that are close to each other.
-
Replace power supply following the previous instructions in reverse.
-
-
-
Remove the connectors to the power supply board, i.e. 120V connector and the three other connectors being careful to note placement of the two connectors on the left side that are close to each other.
-
Remove the power supply board and bring to the location to be desoldered.
-
Desolder capacitors using the soldering iron and some flux and solder.
-
Desolder diodes using the soldering iron and some flux and solder.
-
-
-
Clean PCB trace locations with solder wick and isopropyl alcohol or cleaner. Solder new solder in location leaving hole still so components can be inserted.
-
Carefully noting polarity of the capacitor, place correct new capacitor(s) in PCB location(s).
-
Carefully noting polarity of the diode, place correct new diode(s) in PCB location(s).
-
Solder the components in place using flux and solder.
-
Follow step 2 in reverse to replace board, brackets if applicable and back cover.
-
To reassemble your device, follow these instructions in reverse order.
