Introduction

If the coin cell or CMOS battery of your Lenovo ThinkPad T480 begins to fail, follow this guide to replace it.

The CMOS or coin cell battery provides power to the CMOS (complementary metal oxide semiconductor) chip. Some signs of CMOS battery failure include: settings in the computer setup changing, the clock resetting, “Booting Error” messages, the laptop running slowly, or the laptop shutting down.

Prior to beginning this repair, be sure to disable the internal battery, shut down the laptop, and disconnect from the external power source.

  1. IsnhEpxDL1S62wJb
    IsnhEpxDL1S62wJb
    crrVCEAMWal4MQYJ
    • Disable the battery, power down, and unplug your device before you begin.

    • Flip the laptop over so the bottom of the device is showing.

  2. JImDPDOLndVQGGwS
    JImDPDOLndVQGGwS
    gp3rFiNWn4YLJqUR
    lkVNtucsw11AlWrR
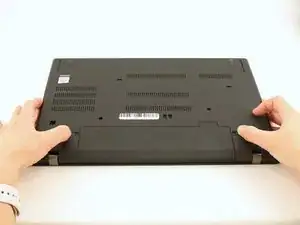
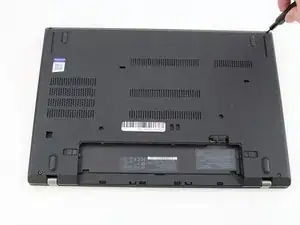
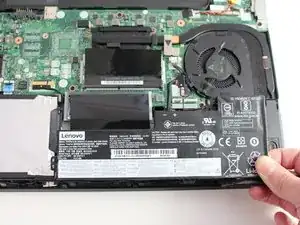
    • Using your fingers, slide the lock on each side of the battery to the unlocked position.

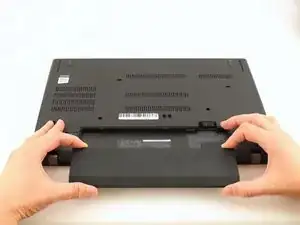
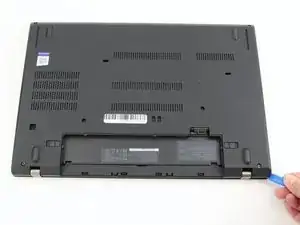
    • Remove the battery from the slot.

  3. E1PWOUdEVSVKIAN2
    E1PWOUdEVSVKIAN2
    R3yUwvFbSoSNAl2O
    • Using the Phillips #1 screwdriver, loosen the six captive screws.

  4. 4UMQtbC5yMPQDGDG
    4UMQtbC5yMPQDGDG
    nZwHZQAuROh1AUQm
    Ffv6mtRVNaYvSJFg
    • Insert the blue plastic opening tool into the space between the lower case and the chassis.

    • Slide the opening tool around the perimeter of the case to release the clips holding the case and the chassis together.

    • If it feels like the battery well portion of the back cover isn't loose, these clips may be holding the cover to the laptop. Use your opening tool to pry the clips loose and try removing the cover again.

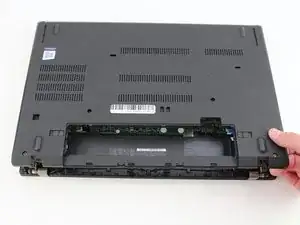
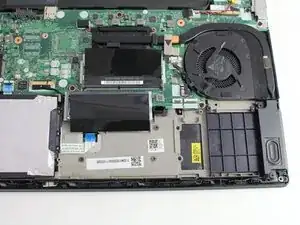
    • Remove the back case.

    I found a tough spudger (or even better a plectrum) is best here as the clips, although easy to separate, hold the case firmly leaving a tight gap which a soft spudger may fail to enter.

    Benjamin Kinsey -

    Hi Benjamin, thanks for the tip!

    Sarah Westberg -

    You also have to pry the near the battery. I experienced that you can't pry the front side.

    Minko Kelko -

    I used a credit card to pry the clips loose, it worked great. Added 2nd RAM stick easily.

    NFR Computers -

  5. Dp4ruFSV1XShvJHA
    Dp4ruFSV1XShvJHA
    DZgJRSuysLNTRUTA
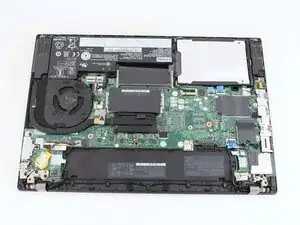
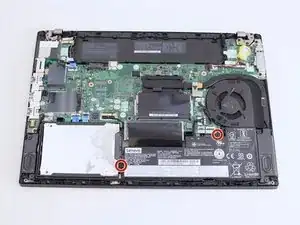
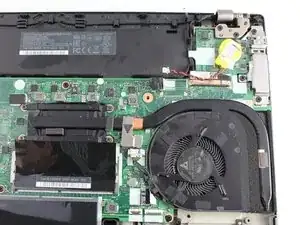
    • Use a Phillips #1 screwdriver to remove the two 4.6 mm screws that secure the internal battery to the frame.

  6. d2BHjhJZ5SS4YVHY
    d2BHjhJZ5SS4YVHY
    AhMMEoiFlEiIXit1
    eJ1fGJPJGabEuQ4l
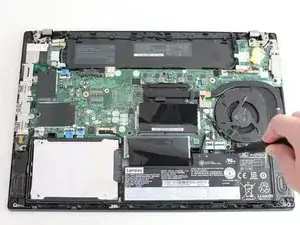
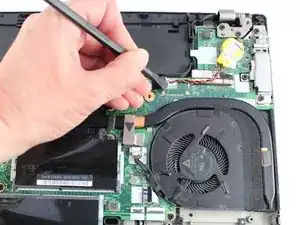
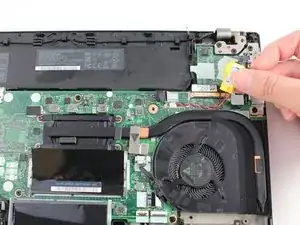
    • Use the spudger to slide the battery socket connector parallel to the motherboard and out of its socket on the motherboard.

  7. 3Buro4rTwTh6oRWC
    3Buro4rTwTh6oRWC
    jORCGqdFFBilhTkU
    • Lift the battery straight out of its recess and remove it.

    • If the battery is difficult to remove from the recess, use a nylon spudger to gently lift it on one edge, making it easier to grasp and remove by hand.

    • To prevent damage or potential fire, do not bend or flex the battery. Only use a plastic spudger and avoid any sharp tools that could puncture the battery.

    DO NOT wedge out the battery - T480 has two screws that hold down a plastic battery tray which easily lifts out after the two frame screws are removed. Wedging out will ruin the battery and could damage the cell and cause a fire.

    Poseidon219 -

    The guide says to remove those two screws. They are "lifting" with the wedge. Probably more of a way to promote their tools than out of necessity, but idk

    Lorenzo Serrano -

  8. XDvVbqnVNkFZa1SP
    XDvVbqnVNkFZa1SP
    rRlw2SRqRyKRpQlr
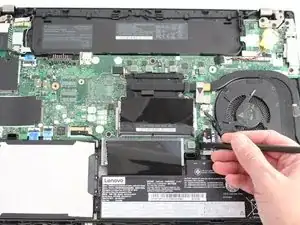
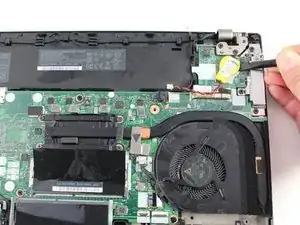
    • Using an IC extractor or black nylon spudger, unplug the connector from the socket on the motherboard.

    • This connector may be very difficult to remove and is easily damaged. Be careful that you don't damage the port when removing the coin cell battery connector.

  9. gLpXKeOE4huVGpsb
    gLpXKeOE4huVGpsb
    RGTpvgepKAJmki5V
    • Using the black nylon spudger, pry the coin cell battery off of the motherboard.

    • The coin cell battery is stuck to the board with a light adhesive.

Conclusion

To reassemble your device, follow the above steps in reverse order.

Take your e-waste to an R2 or e-Stewards certified recycler.

Repair didn’t go as planned? Try some basic troubleshooting, or ask our Answers community for help.

Sarah Westberg

Member since: 11/03/19

29423 Reputation

One comment

good documentation easy to follow top woman

charles akister -