Introduction
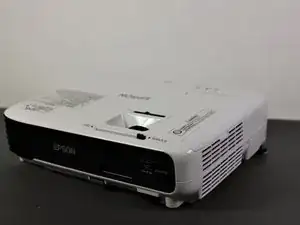
This guide will show you how to replace the built-in speaker on your Epson VS240 projector. If you're experiencing sound distortion, complete speaker failure, or other sound issues, this repair could fix the problem. The speaker is relatively easy to access, but because it connects to the motherboard via a delicate wire, careful handling is required during the replacement process.
Before starting, make sure you have the required screwdrivers to remove the projector’s shell and speaker. Take your time when working with the internal components to avoid damaging any sensitive parts.
It’s essential to power off the projector and disconnect it from any power sources before beginning. This will reduce the risk of electrical shock or damage to the projector’s internals. Additionally, static discharge can harm the internal circuitry, so grounding yourself before handling internal components is advised.
This process will involve:
- Unscrewing multiple screws to remove the shell
- Unscrewing the speaker from its position
- Disconnecting the wire from the motherboard
- Installing the new speaker
- Reversing the instructions to reassemble the projector
Important: Ensure the projector is powered off and unplugged before starting.
-
-
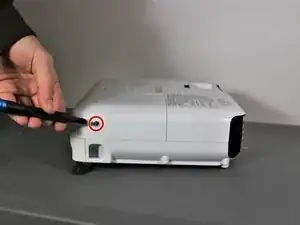
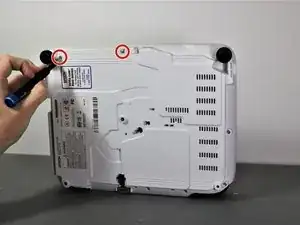
Using the Phillips #2 screwdriver, loosen the single captive screw on the left side of the projector.
-
Slide the panel off and remove it from the device.
-
-
-
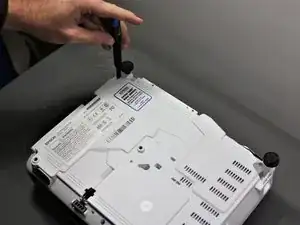
Use the Phillips #2 screwdriver to remove the three 5 mm screws.
-
Using the same Phillips #2 screwdriver, remove the single 8 mm silver screw.
-
-
-
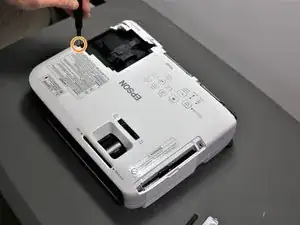
Use a Phillips #1 screwdriver to remove the two 10 mm silver screws from the bottom of the device.
-
-
-
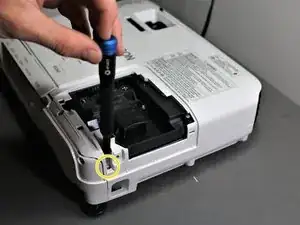
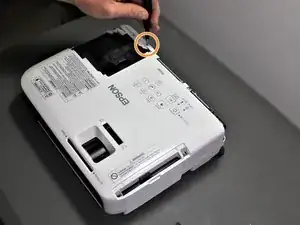
Use a Phillips #1 screwdriver to remove the single 10 mm screw where the panel was removed in Step 1.
-
Remove the white back plate from the device.
-
-
-
Flip the projector over so that the underside (side with the feet) is facing you.
-
Use a Phillips #1 screwdriver to remove five 10 mm screws on the underside of projector.
-
Using the same Phillips #1 screwdriver, remove a single 10 mm screw in the center hole.
-
-
-
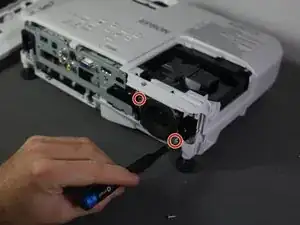
Use a Phillips #1 screwdriver to remove two 10 mm screws from the openings on each side of the air filter, on the topside of the projector.
-
Using the same Phillips #1 screwdriver, remove the two 10 mm screws where the white panel was removed on the topside of the projector in Step 1.
-
-
-
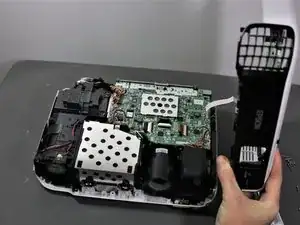
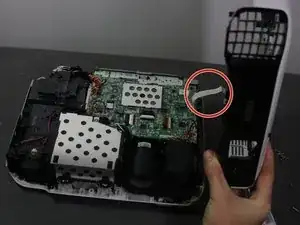
Gently lift top cover and place it on its top next to the projector so that the ribbon has no tension on it.
-
Gently pull the brown tape connecting the cable to the motherboard and then remove the shell from the device.
-
-
-
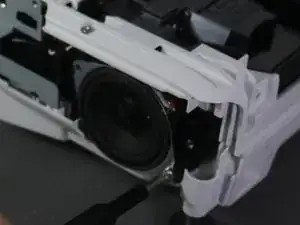
Using the Phillips #1 screwdriver, remove the two 7 mm screws holding the speaker to the device.
-
-
-
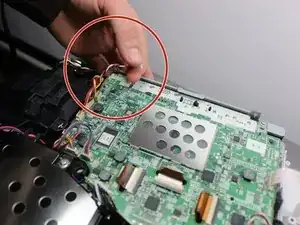
Unplug the wire combination of red, black, and white wires from the motherboard using a spudger or fingernail.
-
Lift and remove the speaker from the device.
-


To reassemble your device, follow these instructions in reverse order.