Introduction
This detailed guide demonstrates how to replace the tail lights on a 2024 Jeep Wrangler (JL):
Replacing a tail light might seem complicated, but it’s actually a straightforward process that can save you time and money. Whether you’re dealing with a burned-out bulb or a cracked light cover, this guide will walk you through the steps to restore your tail light to working order.
Important Tips Before You Begin:
- Handle With Care: Avoid touching the glass of the new bulb, as the oils and salts on your hands can cause the bulb to burn out faster. Use gloves or handle the bulb by the connector.
- Check Compatibility: Refer to your Jeep's manual to ensure you purchase the correct replacement bulb.
Pro Tip: Replace Both Lights
If one of your tail lights has gone out, the other one is likely to fail soon as well. To save time and avoid future inconvenience, it’s a good idea to replace both tail lights at the same time.
Safety Precautions:
- Make sure your Jeep is turned off and in park.
- Disconnect the engine battery before starting any work on your vehicle to ensure safety.
Parts
-
-
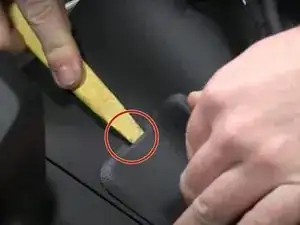
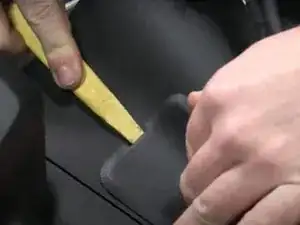
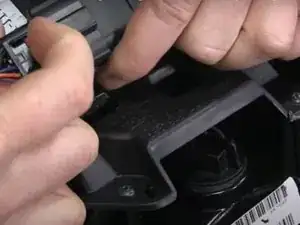
Access the tab from the interior rear of the Jeep.
-
Use a plastic trim tool and insert it under the tab or in the gap between the tab and the surrounding panel.
-
Apply gentle pressure to pry up or to the side, depending on the location of the tab.
-
Work around the edges of the tab cover if it doesn’t release right away, prying little by little until it pops free to reveal the access hole.
-
-
-
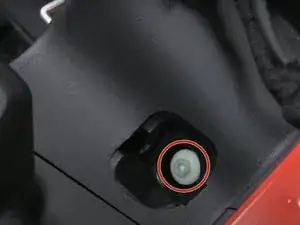
Select a T40 Torx bit and ratchet: Choose a Torx bit of the correct size (T40) and attach it to a ratchet or suitable driver.
-
Apply pressure to keep the tool steady: Hold the ratchet or driver securely while applying gentle pressure to keep the bit from slipping out of the screw head.
-
Turn the ratchet or driver counterclockwise to loosen the screw and remove it from the tail light assembly.
-
-
-
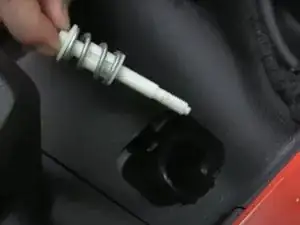
Once it's loosened, use your fingers or a small tool to grab the head of the screw.
-
Slowly pull the screw out of its hole, ensuring you don't drop or lose it. The spring components attached to the screw should come out easily.
-
-
-
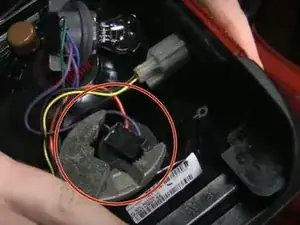
Once the taillight is removed from the rear of the Jeep, locate the wiring harness at the back of the taillight assembly. It should be connected to the taillight via a plug.
-
Slide or pull back on the red locking tab to unlock the connector.
-
After unlocking the red tab, press down on the release tab located near the top of the plug (next to the red tab) to disengage the connector from the taillight.
-
Gently pull the wiring harness away from the taillight assembly while holding down the release tab. The connector should come off easily once the tab is pressed.
-
-
-
Use a Phillips #00 to remove the three screws located on the backside of the taillight housing, near the connection where the wiring harness was attached.
-
-
-
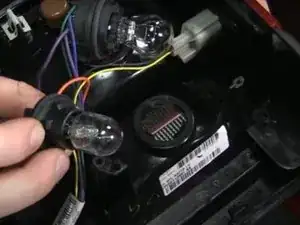
Use a pair of pliers to gently grip the base of the bulb housing.
-
Slowly twist it in a counterclockwise direction to loosen the bulb housing from the taillight assembly.
-
-
-
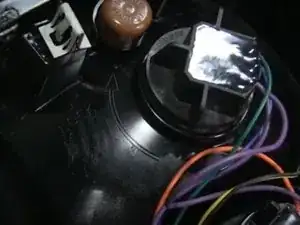
Insert the new bulb into the housing and twist the housing back into place by turning it clockwise.
-


To reassemble your device, follow these instructions in reverse order.
Tip: Always check your car’s manual for specific instructions on accessing the tail light assembly and using the correct replacement bulb.